Xero App Creation
Xero app setup streamlined
Creating an App in Xero Application:
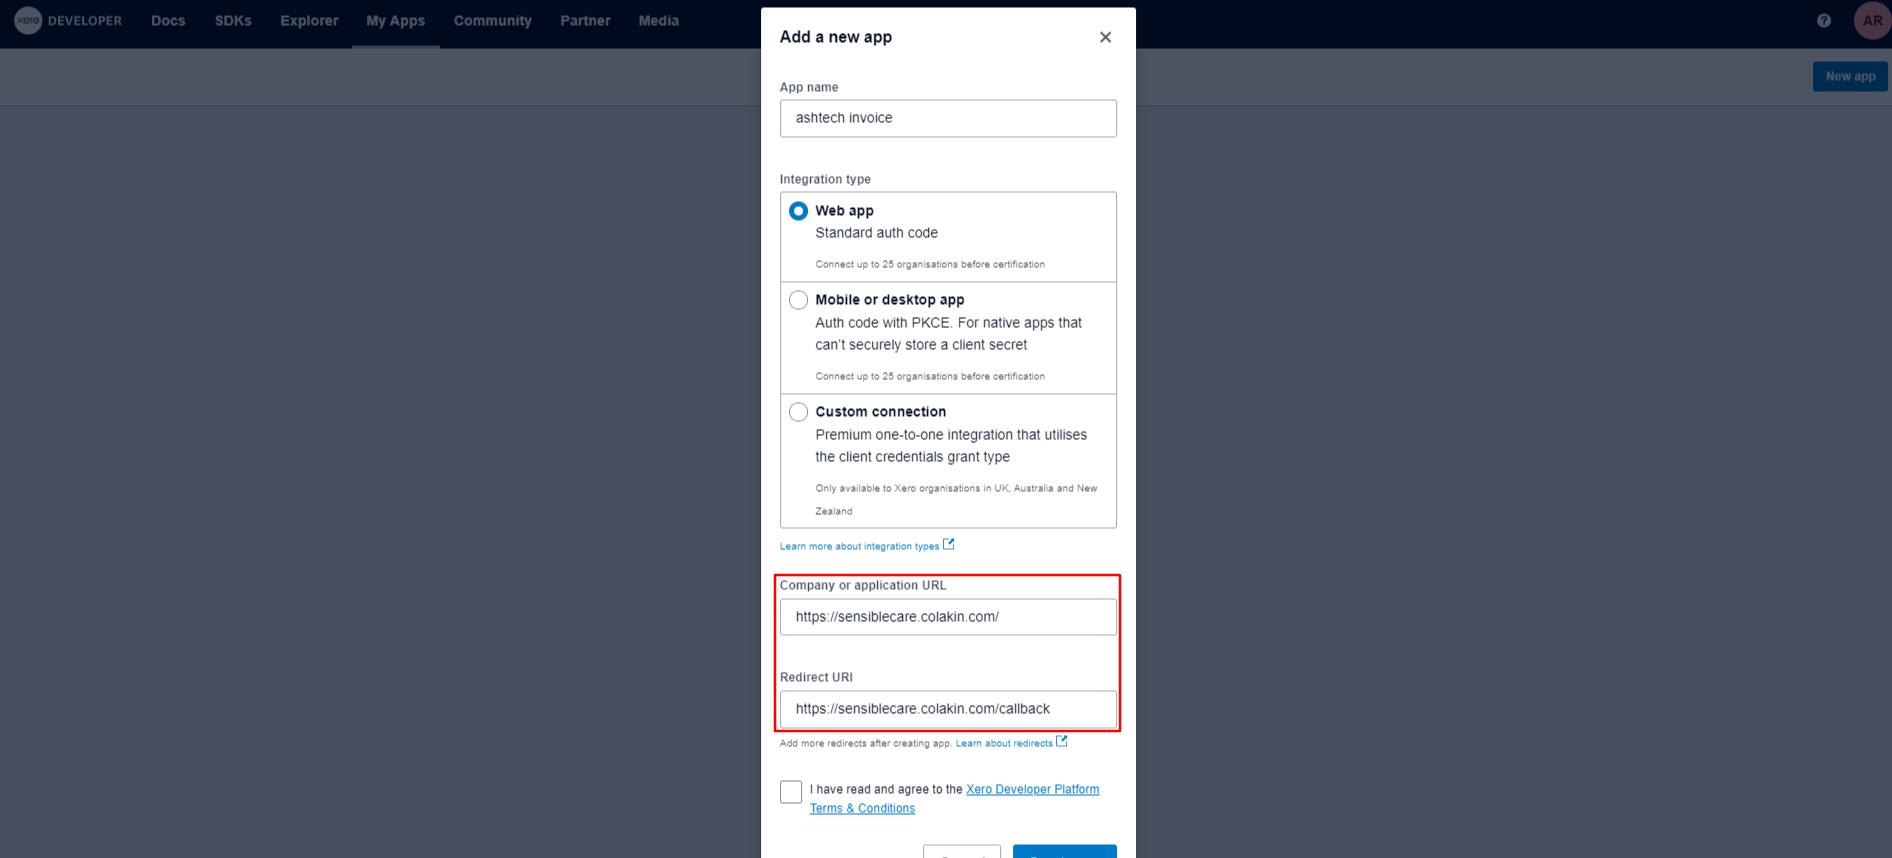
Xero's intuitive invoicing features streamline the process of creating and managing invoices for businesses of all sizes. With the Xero app, users can easily generate professional invoices and seamlessly integrate them into our UI for efficient viewing and tracking.Create a Xero app via https://developer.xero.com to integrate with Sensible Care approval portal.
Steps:
- Click the “web app” option.
- Provide the Company URL and Redirect URL.
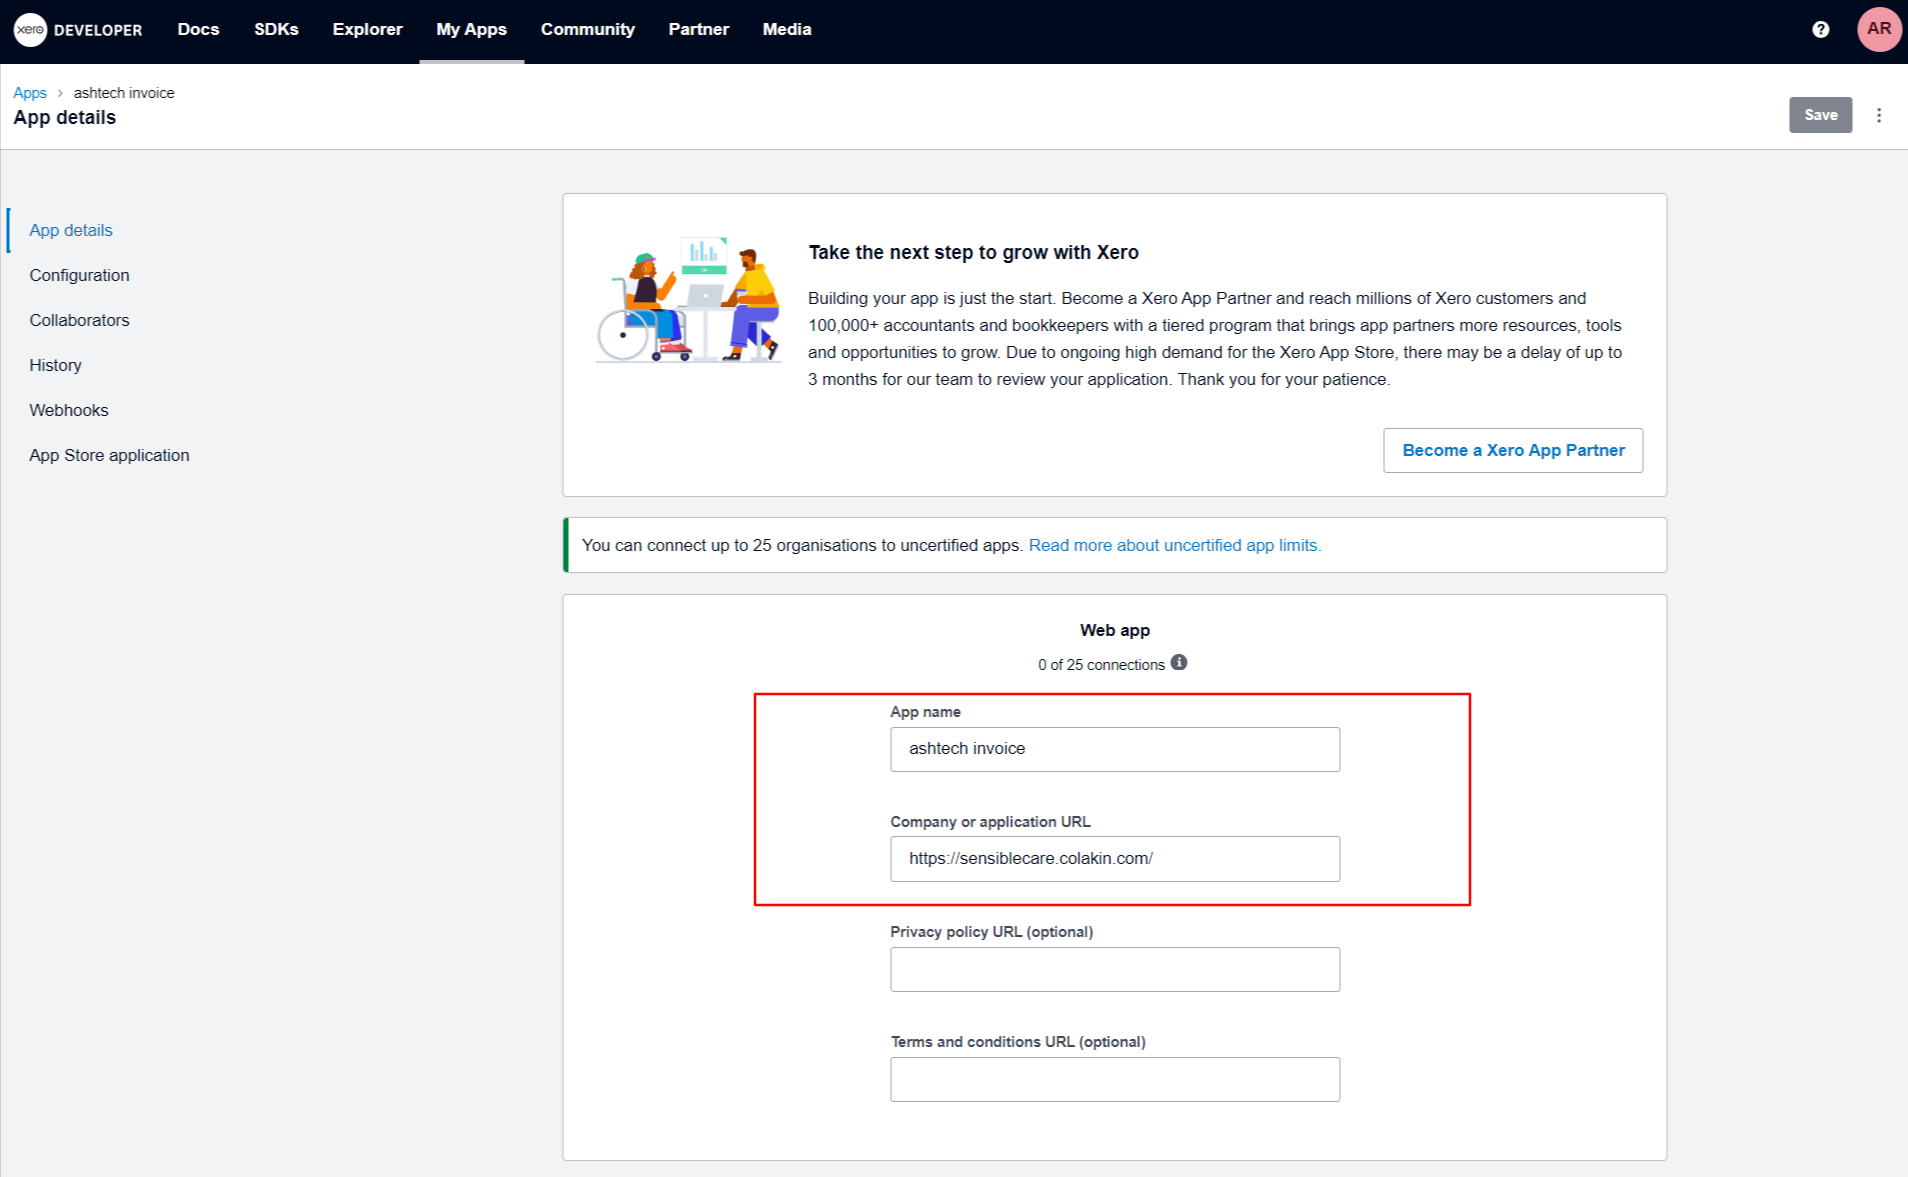
App details page:
The App Page in Xero serves as a pivotal space for defining the identity of your application within the Xero ecosystem.
Steps:
- Enter your app name. This field is required. In the example image, the app name is "ashtech invoice".
- Company or application URL. Enter the URL of your company website or application. This field is required. In the example image, the URL is https://sensiblecare colakin.com/.
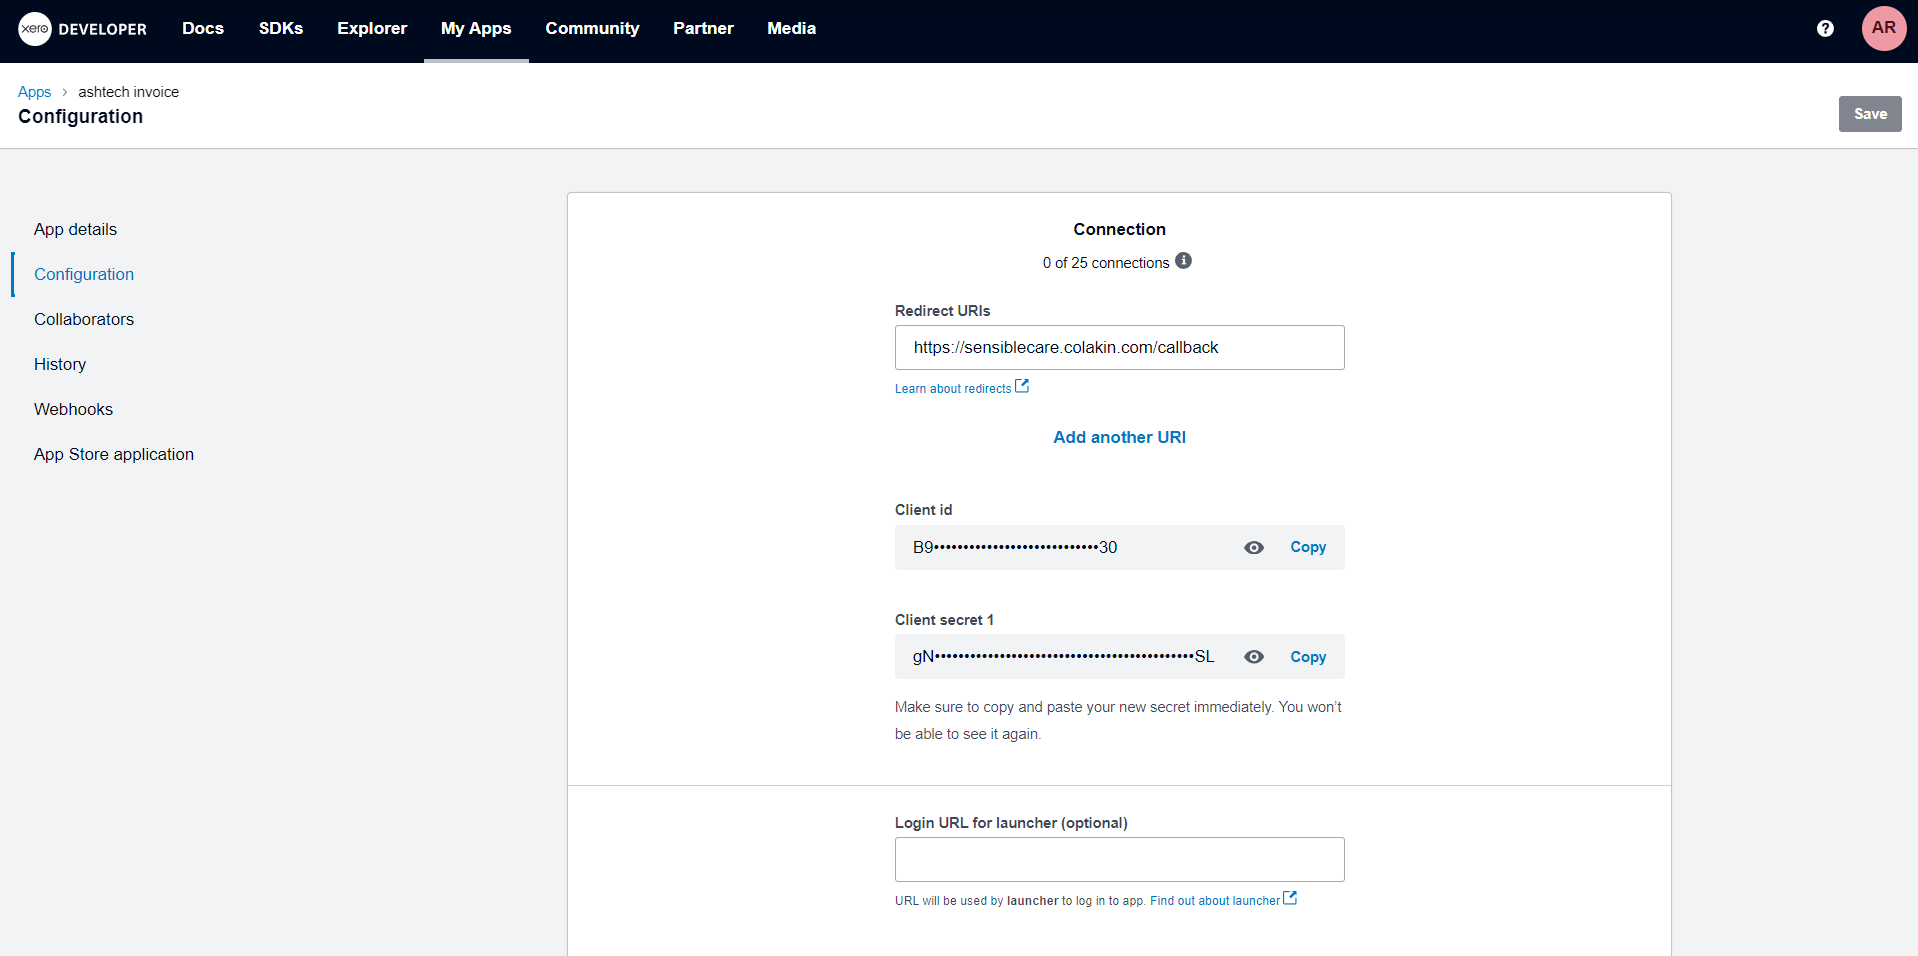
Configuration page:
The configuration page in Xero serves as a user-friendly hub where individuals can easily obtain their client ID and client secret ID. These essential credentials are pivotal for integrating third-party applications with Xero.
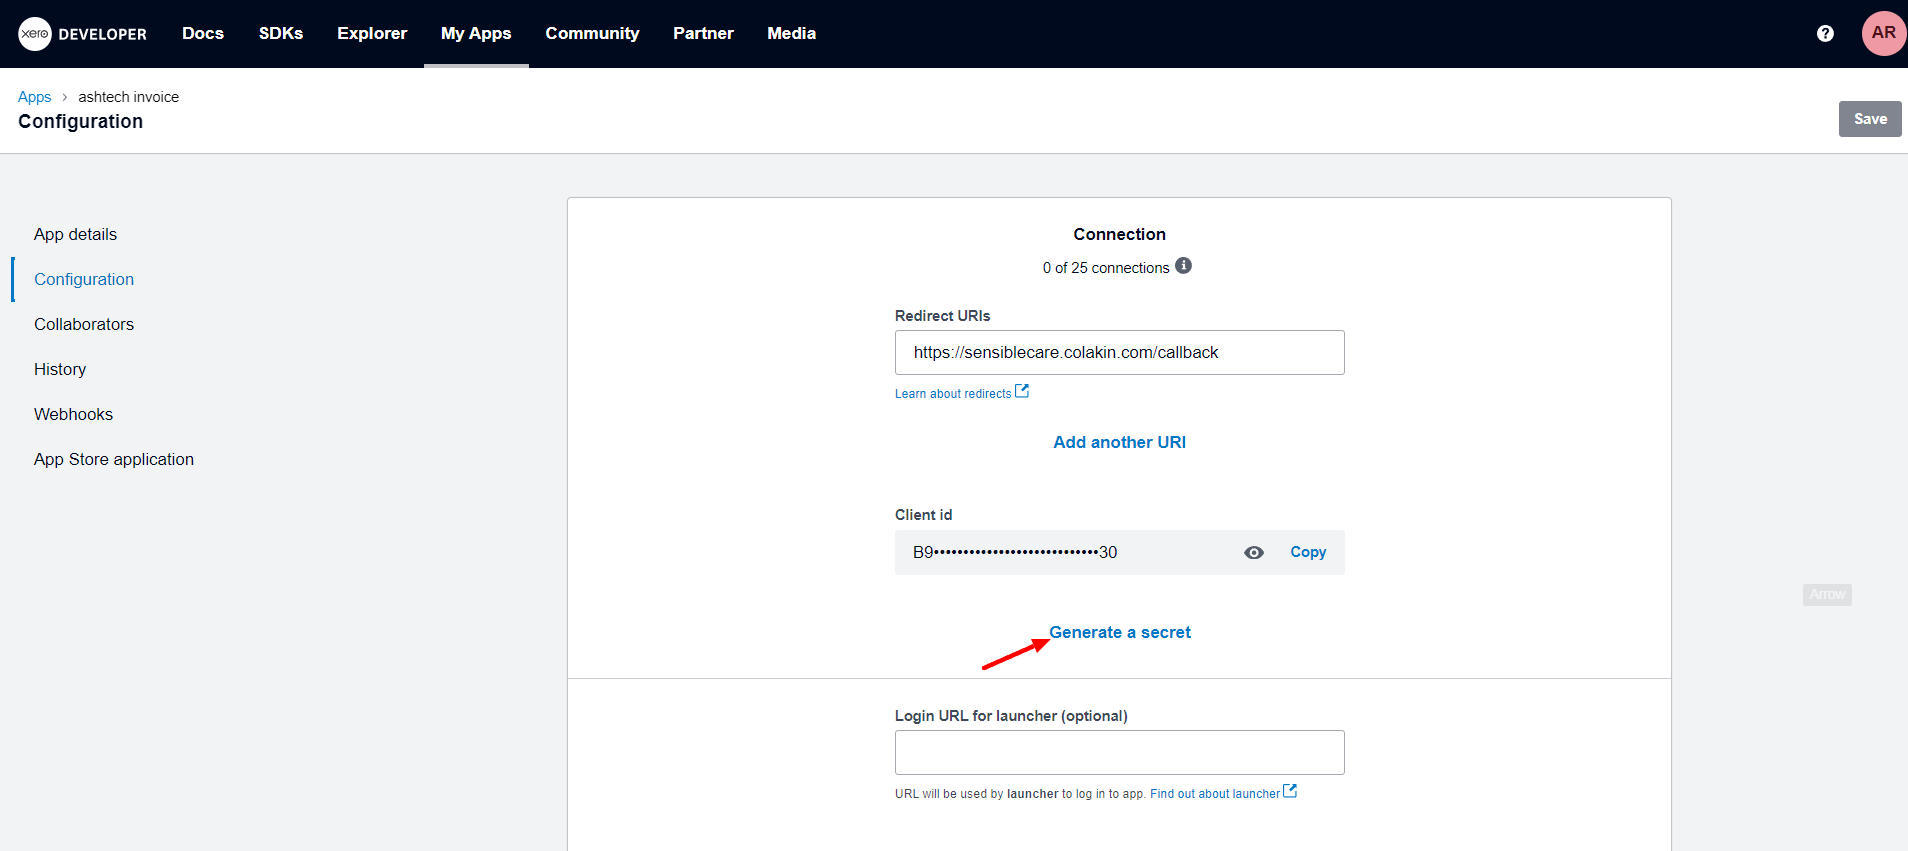
Steps:
- Click on the "Generate a Secret" button shown on the image, and you will get a new secret ID like the below shown images.
- Copy both the "client id" and the "client secret id".
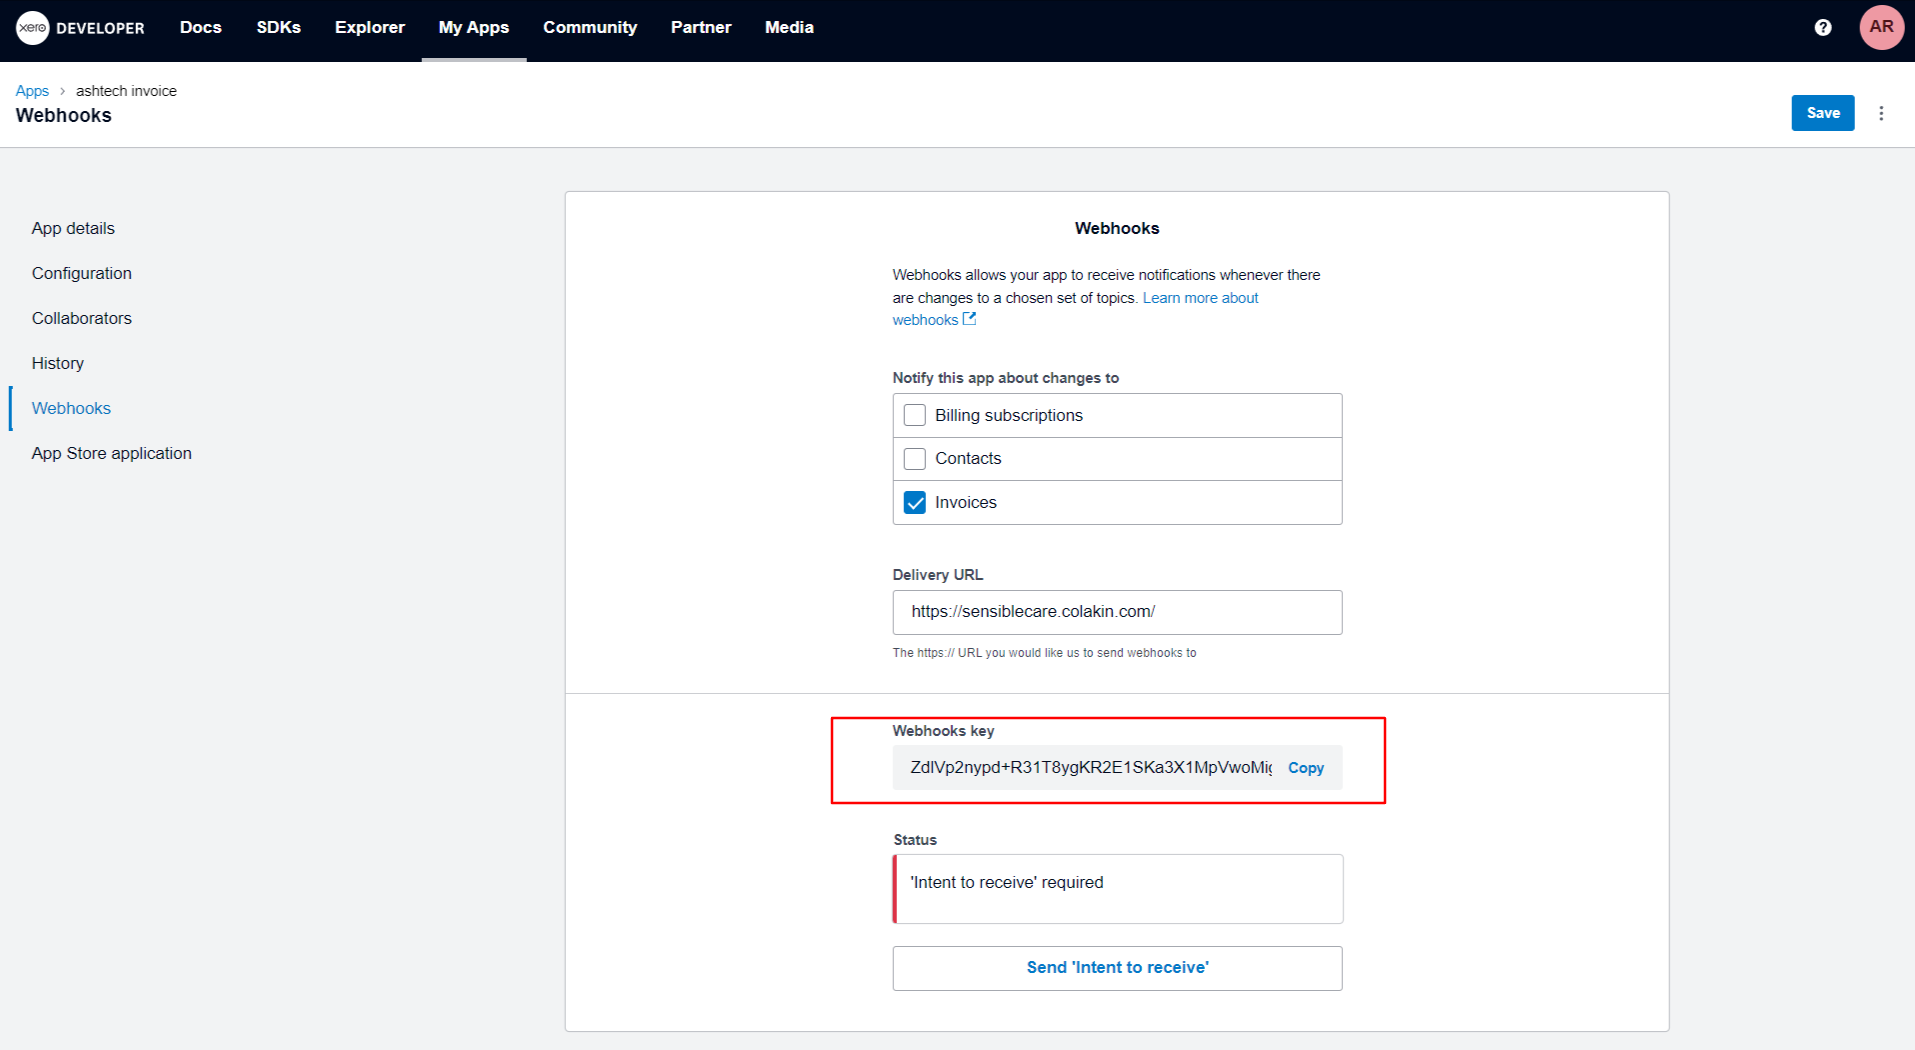
Webhook page :
The Webhook page allows you to configure webhooks for your app, which are notifications that Xero will send to your app whenever there are changes to a chosen set of topics. In this case, you can use a webhook to send invoice data to a specific URL, effectively displaying the invoice live on your desired webpage.
Steps:�
- Navigate to the "Webhooks" tab. This tab is located on the app settings page in the Xero app.
- Select the topics you want to receive notifications for. In this case, you should select the "Invoices" topic. You can also select other topics, such as "Contacts" or "Billing subscriptions", if you want to receive notifications for those changes as well.
- Enter the URL of your desired webpage. This is the URL where you want the invoice data to be sent.
- Click on the "Save" button. This will save your webhook configuration.
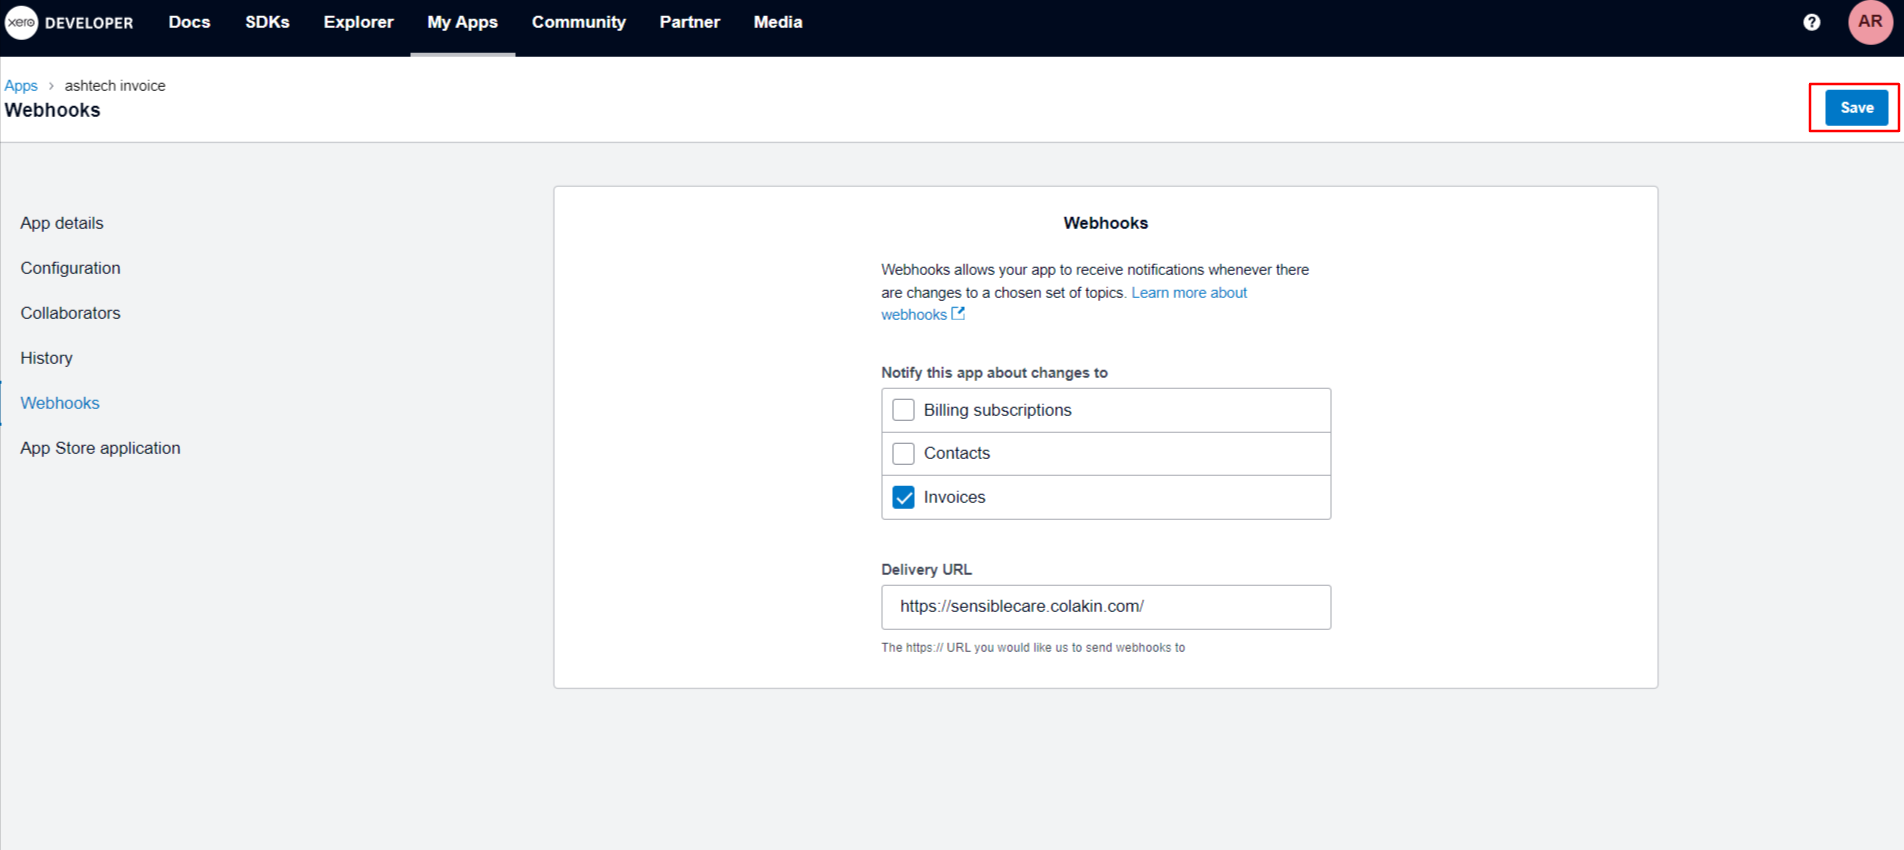
After saving the Webhook configuration in Xero, users will be provided with a unique webhook key. This key acts as a secure identifier, enabling the tracking of events and updates from Xero to an external application.