Xero Account Creation
Complete Xero account setup.
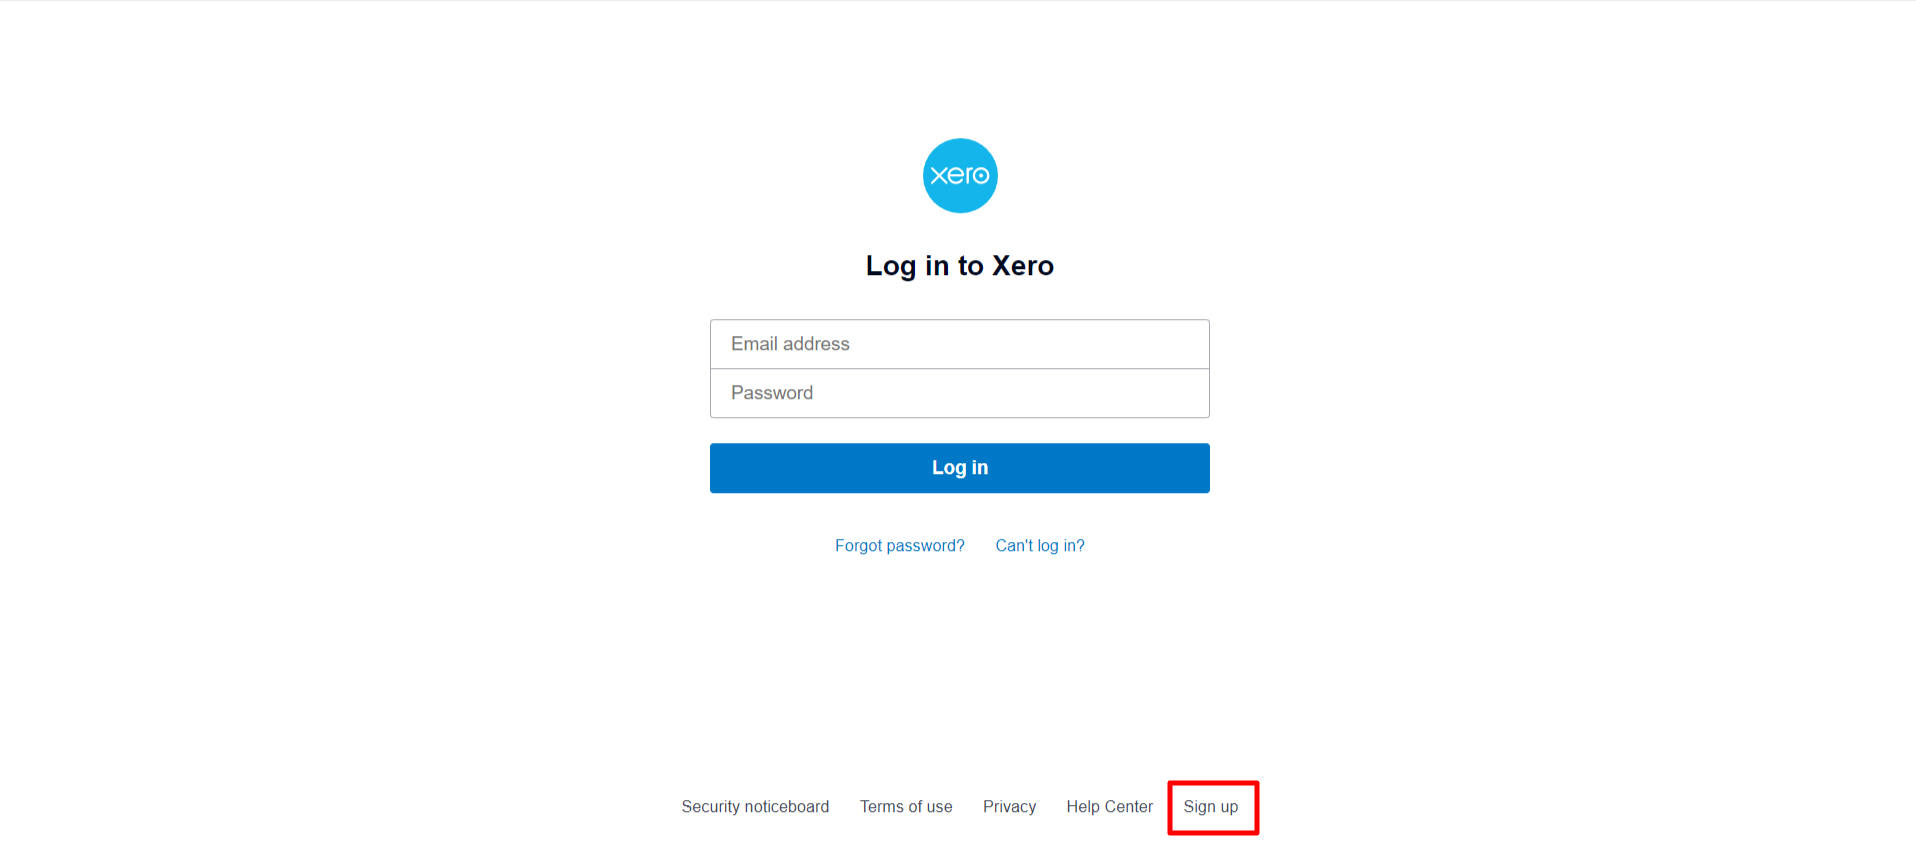
Logging in to Xero:
To sign up on Xero, visit https://www.xero.com/ and click on the "Sign Up" button. Follow the prompts to create your account by providing the required information, and once completed, you'll have access to Xero's accounting services.
Steps:
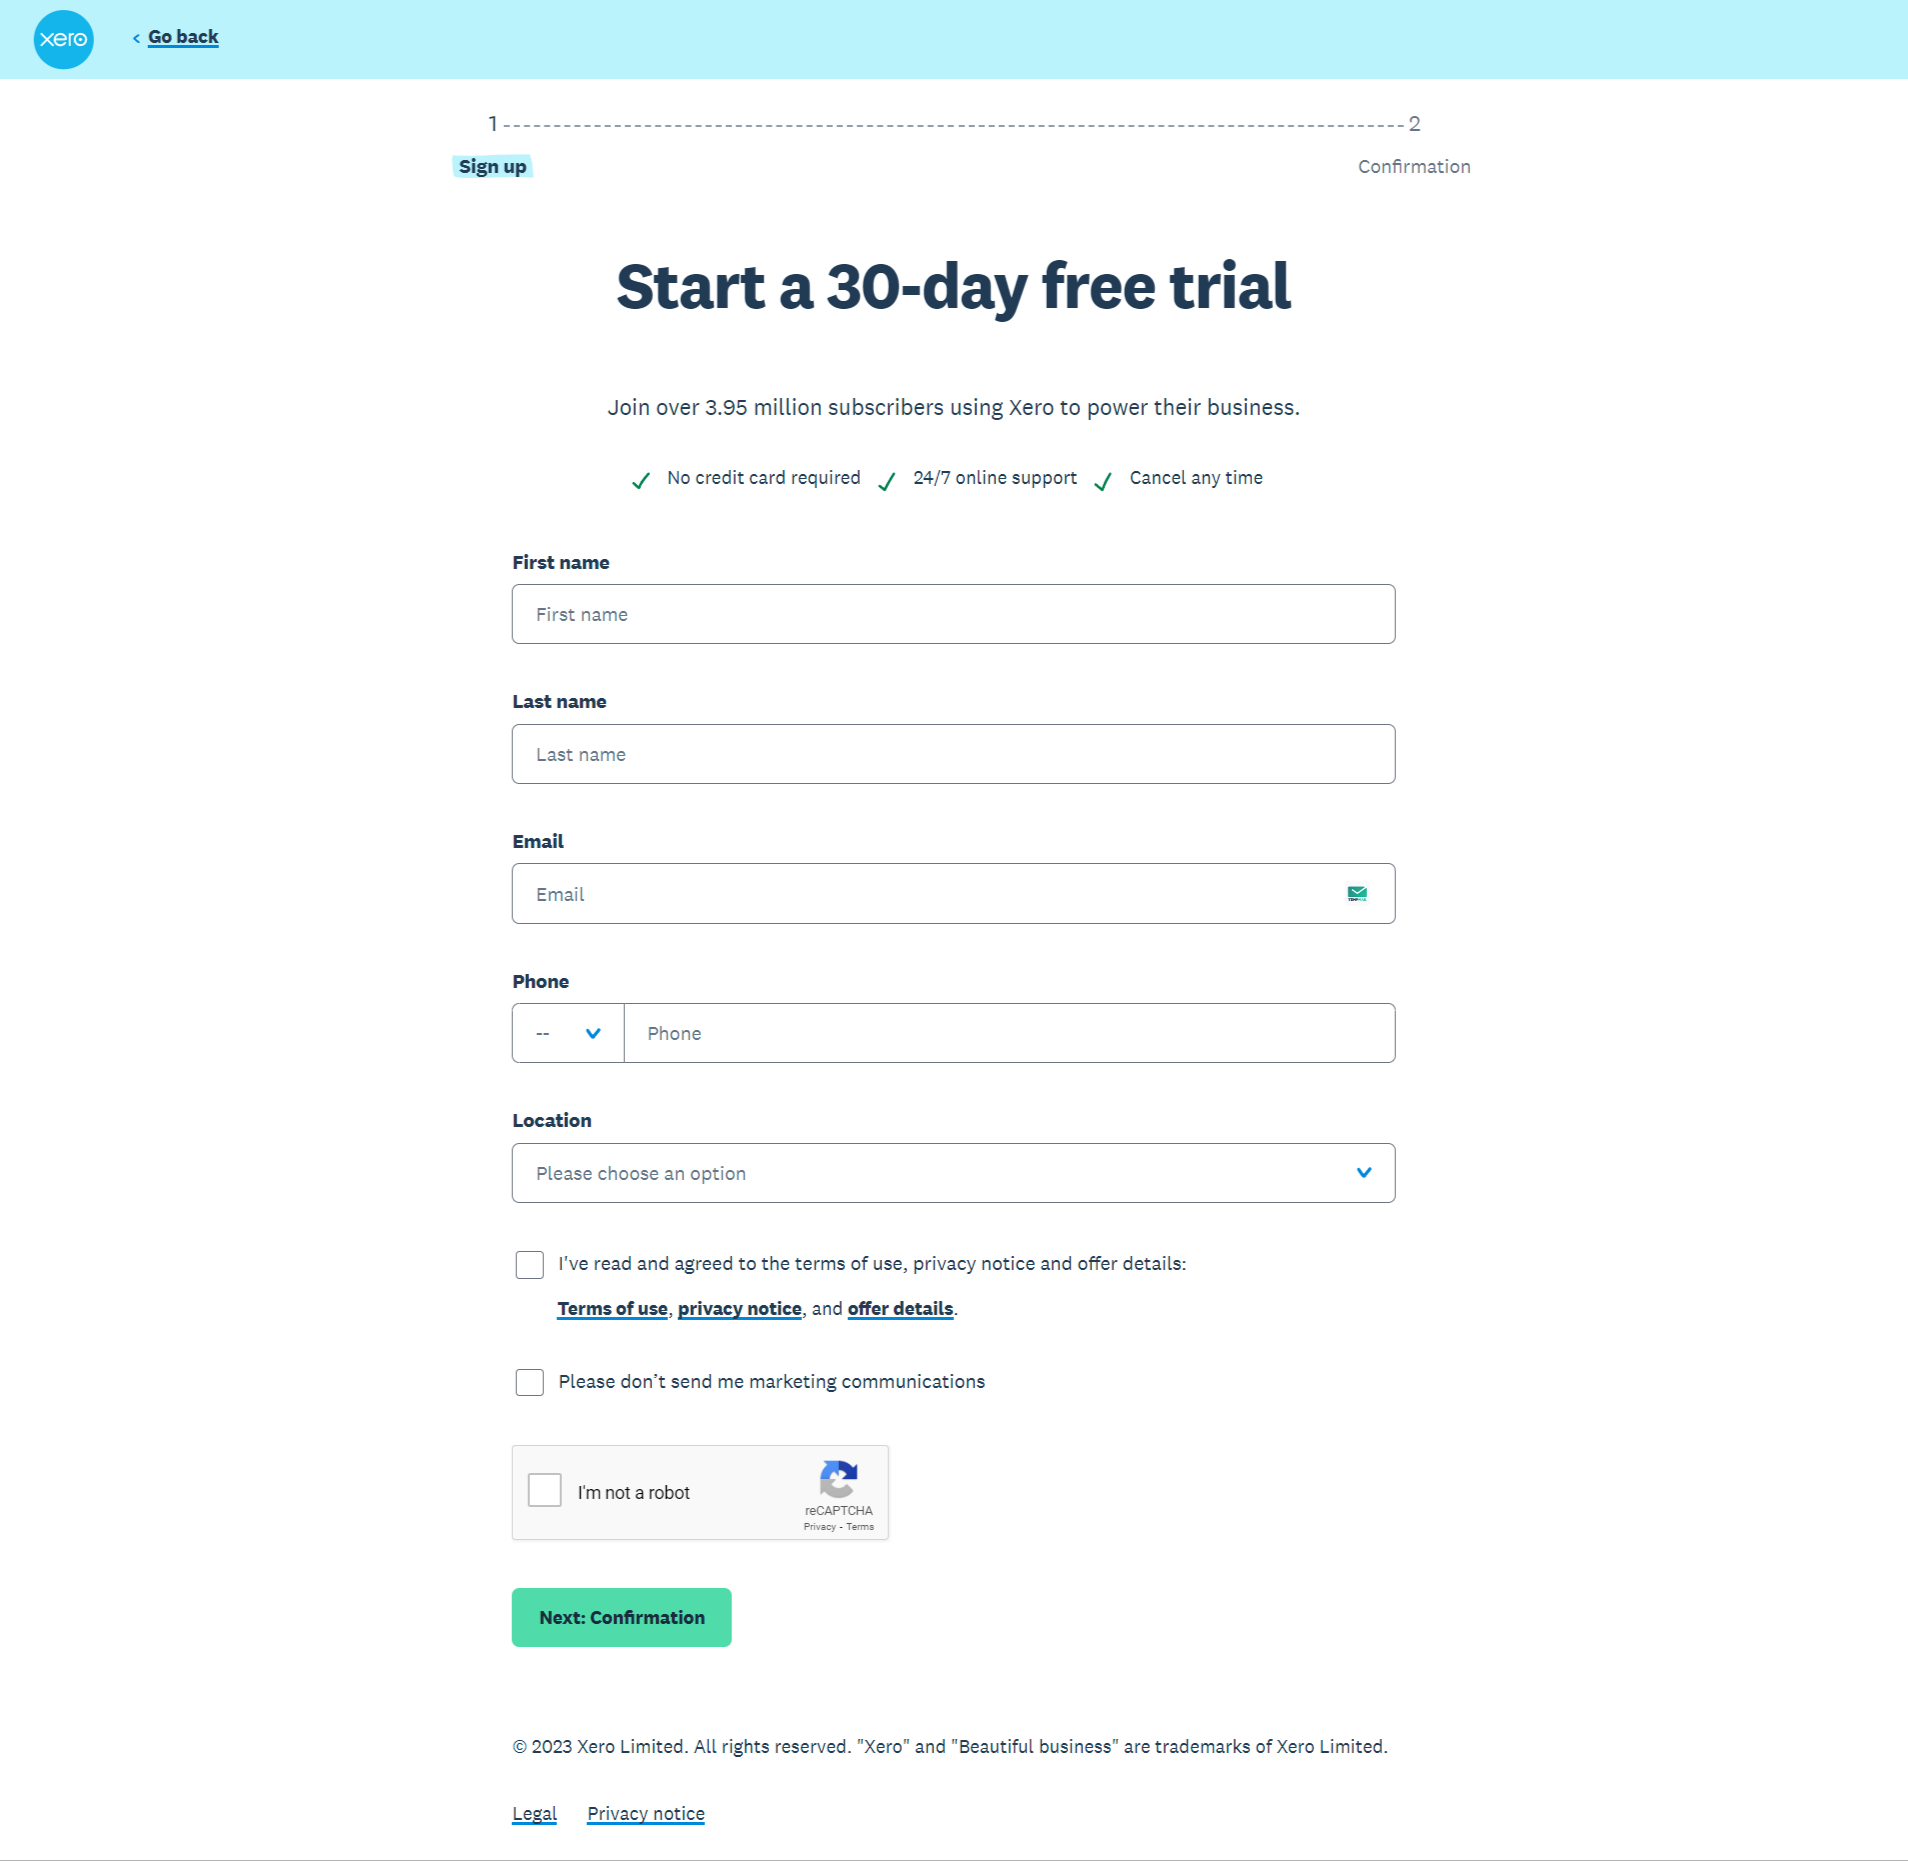
- Enter your first name, last name, email address, and phone number in the corresponding fields.
- Select your location from the dropdown menu.
- Check the box next to "I've read and agreed to the terms of use, privacy notice, and offer details:"
- If you do not want to receive marketing communications, check the box next to "Please don't send me marketing communications".
- Click on the "Next: Confirmation" button.
- Please note that you will need to verify your email address and phone number before you can start your free trial.
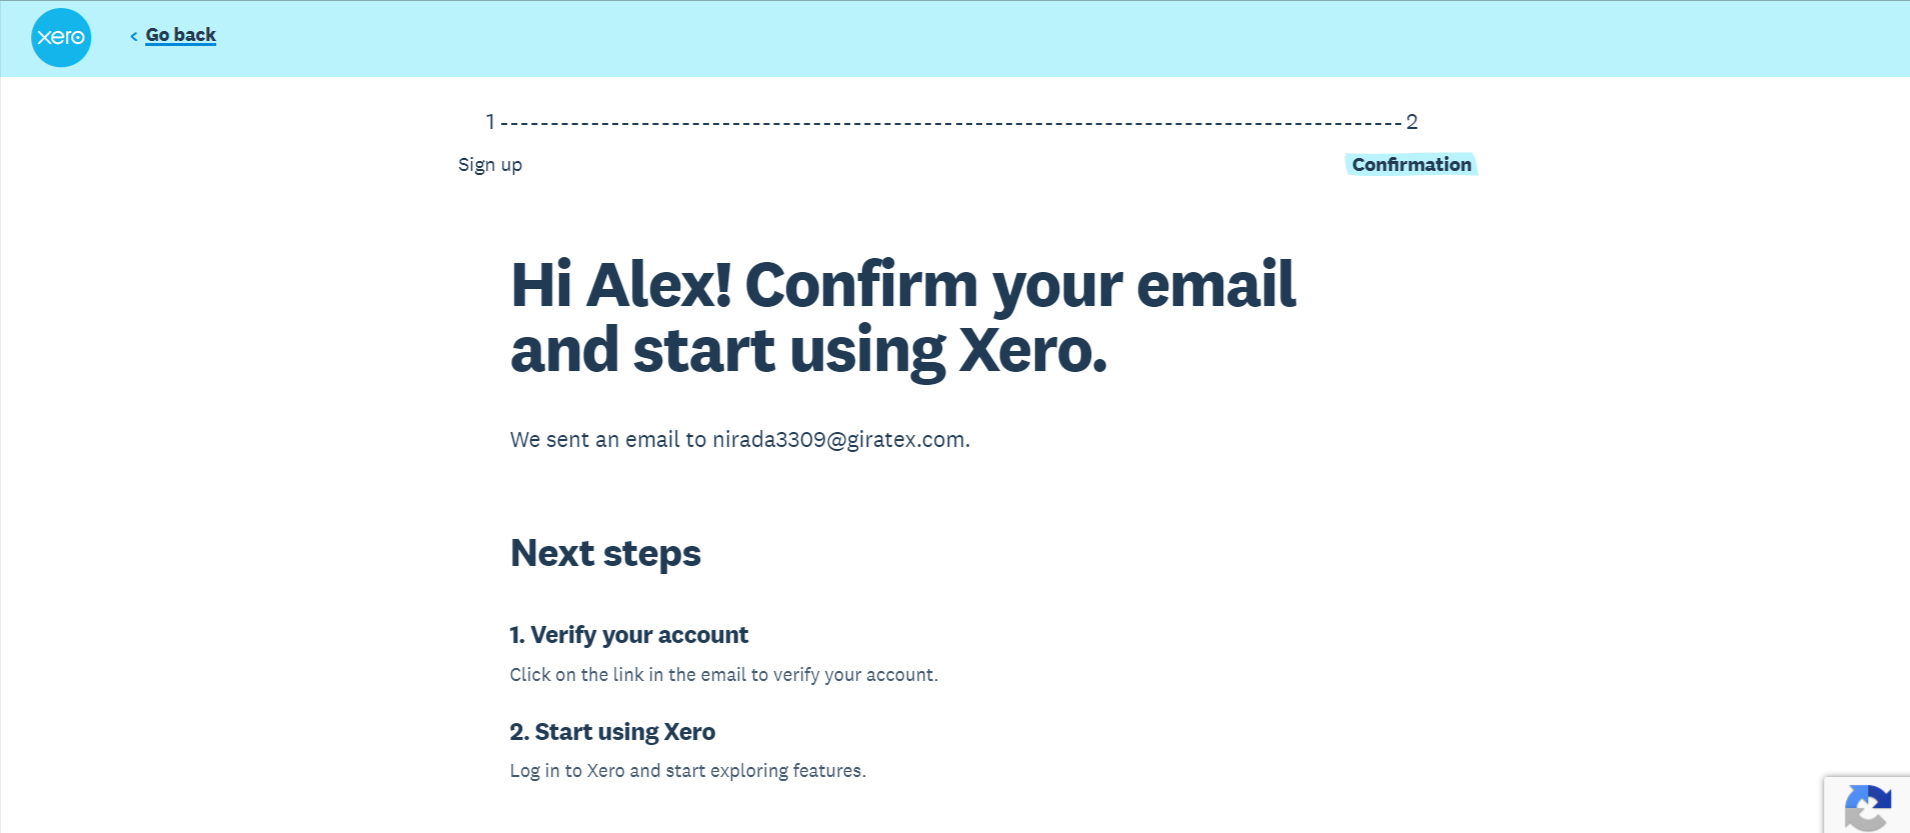
Confirmation page:
This page is displayed after you click the "Next: Confirmation" button on the Xero sign-up page. It contains information about how to verify your email address and start using Xero.
Steps:
- Verify your account. Click on the link in the email that was sent to your email address. This will verify your account and allow you to start using Xero.
- Start using Xero. Log in to Xero and start exploring the features.
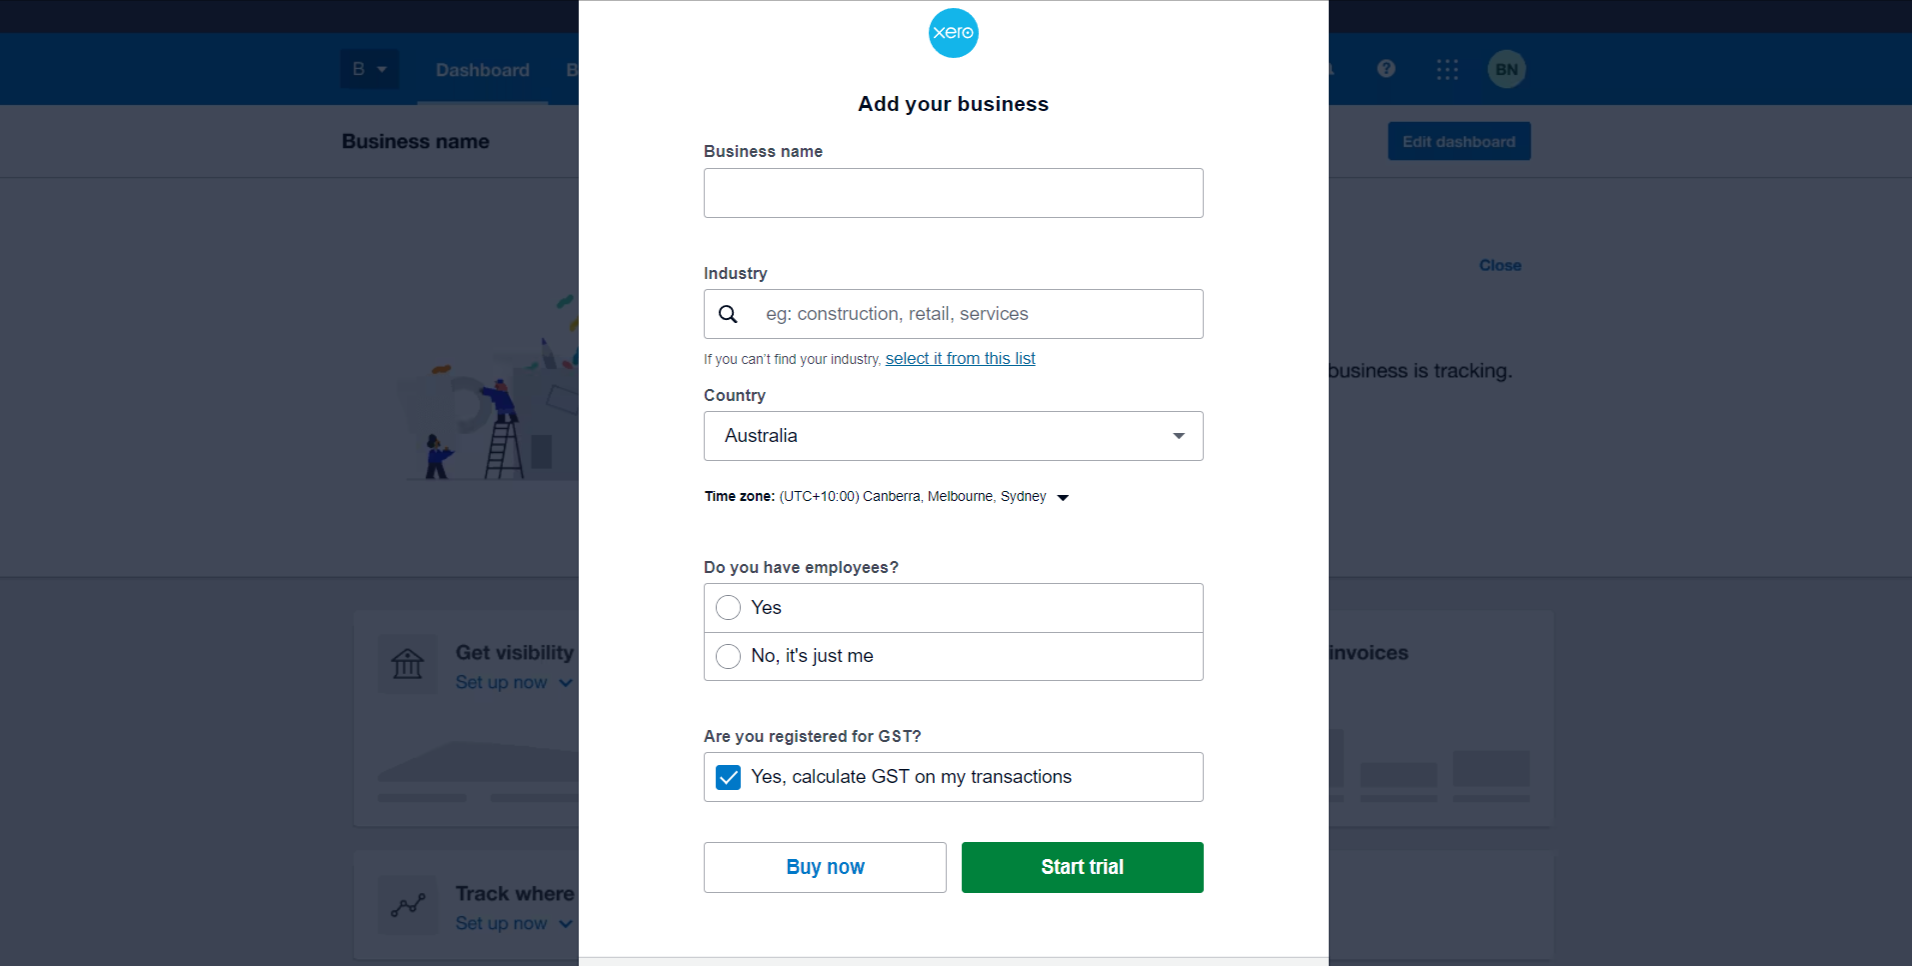
Procedure to add business details in Xero application:
Adding business details in Xero is a straightforward process to tailor the platform to your specific needs.
Steps:
- Enter your business name. This field is required.
- Select your industry. You can either enter your industry in the search bar or select it from the list below. If you cannot find your industry, you can select "Other" and enter it in the text field.
- Select your country. This field is required.
- Select your time zone. This field is required.
- Answer the question "Do you have employees?" Select either "Yes" or "No".
- Answer the question "Are you registered for GST?" Select either "Yes" or "No".
- Click on the "Start trial" or "Buy now" buttons.